
AR with Authoring tools ENTiTi Creator
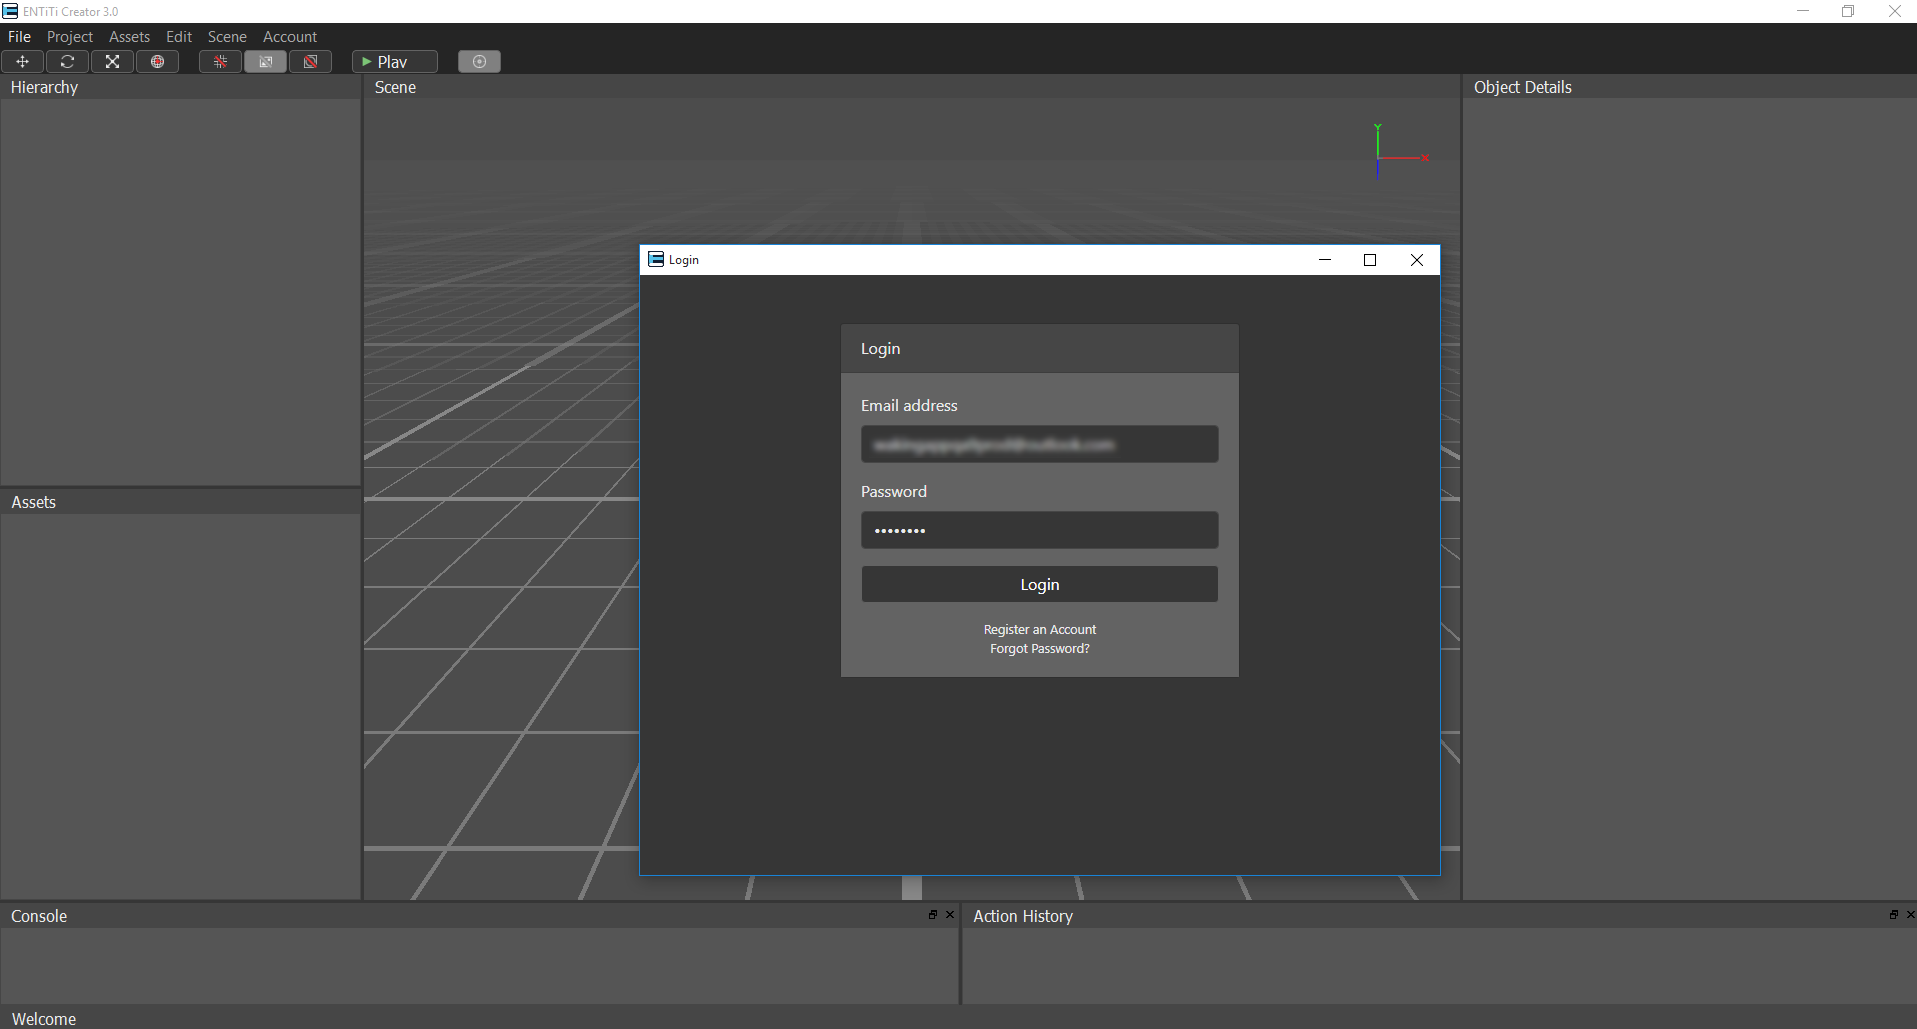
The first screen shown when starting the WakingApp AR Studio is the Login screen.
Usage of the Creator is bound to an active WakingApp developer account.
After providing valid credentials and authenticating them, the next step is to load a project, either by creating a new one or by opening an existing project.
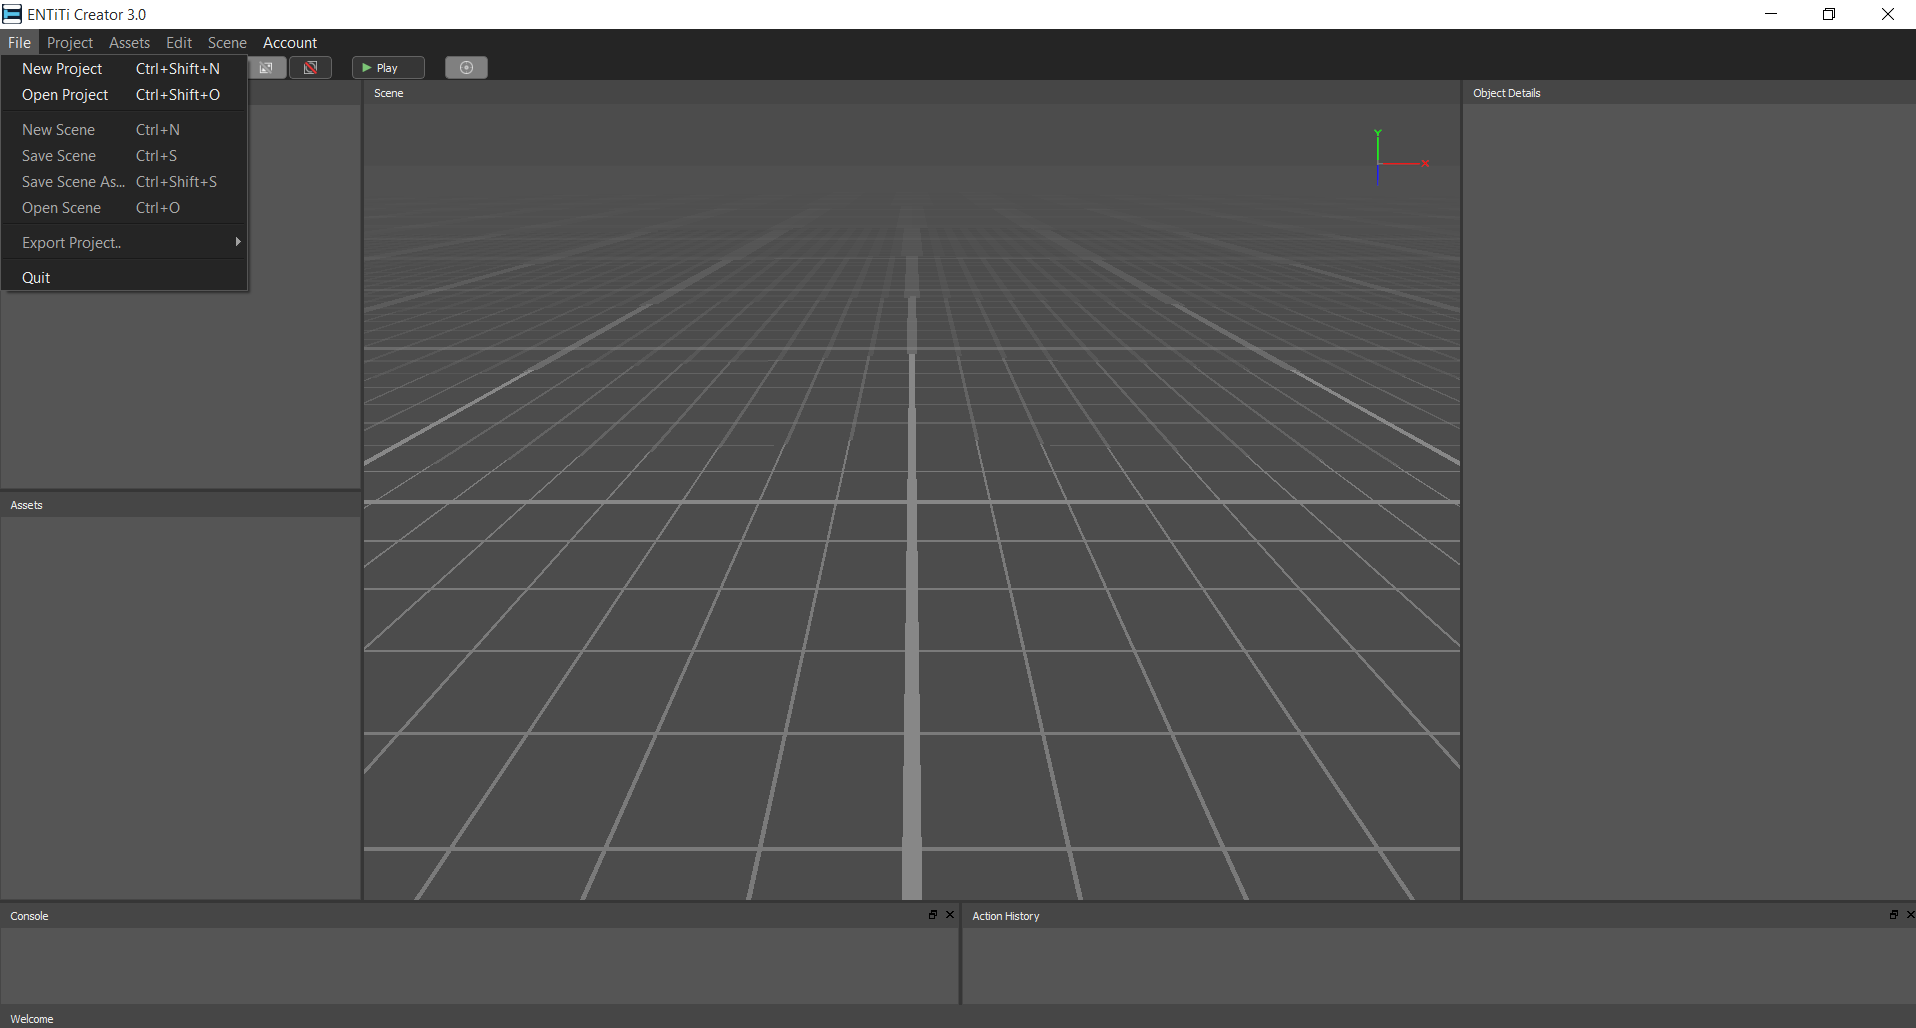
Create a new project
Select the New Project action under the File Menu in the Main Menu Bar by clicking the menu item, or pressing the keyboard shortcut.
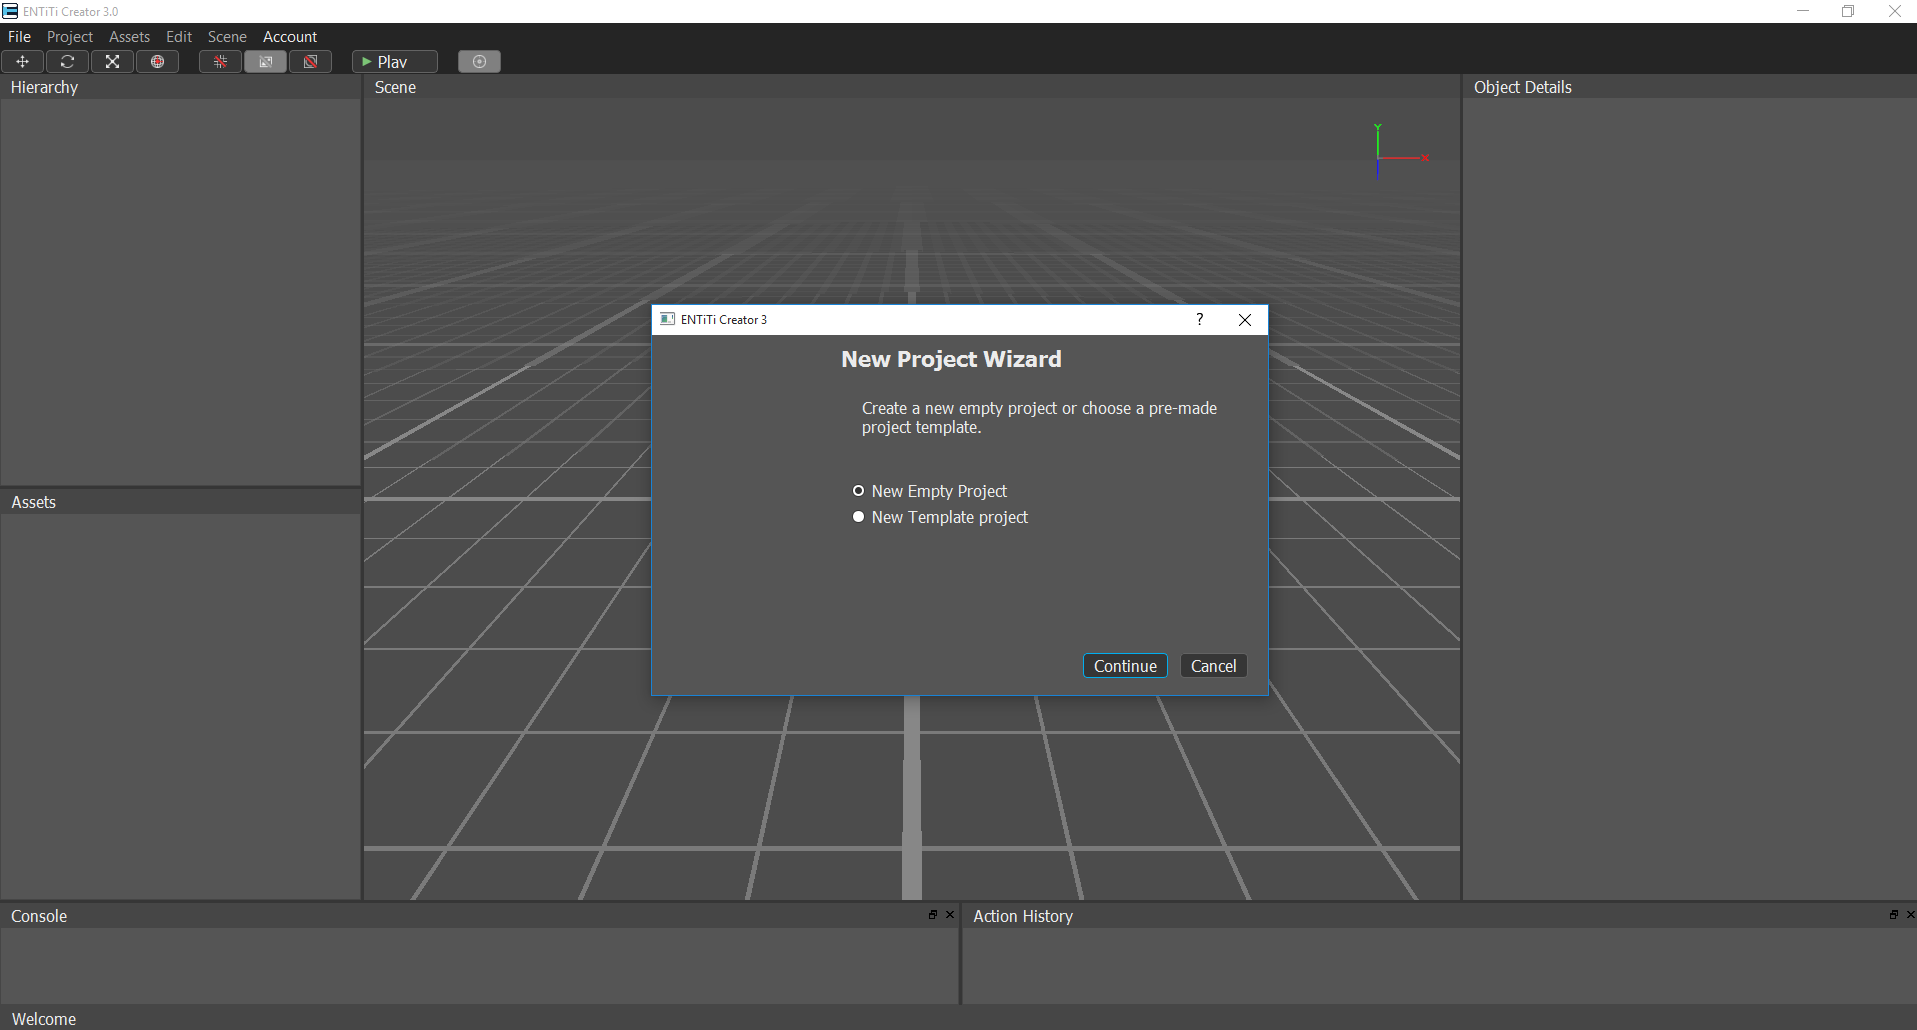
Select the ‘New Empty Project’ option and click Continue.
Templates
By choosing a ‘New Template Project’ you can get an export-ready project. Templates in WakingApp AR Studio are meant to simplify the setup process and have pre-built images, models and scripts.
However, this tutorial takes you through the entire image-tracking setup process of an empty project to understand the workflow better.
Set the Project tracking type to ‘Image Tracking’ and choose a location to save your project, assign the project’s name and click Done.
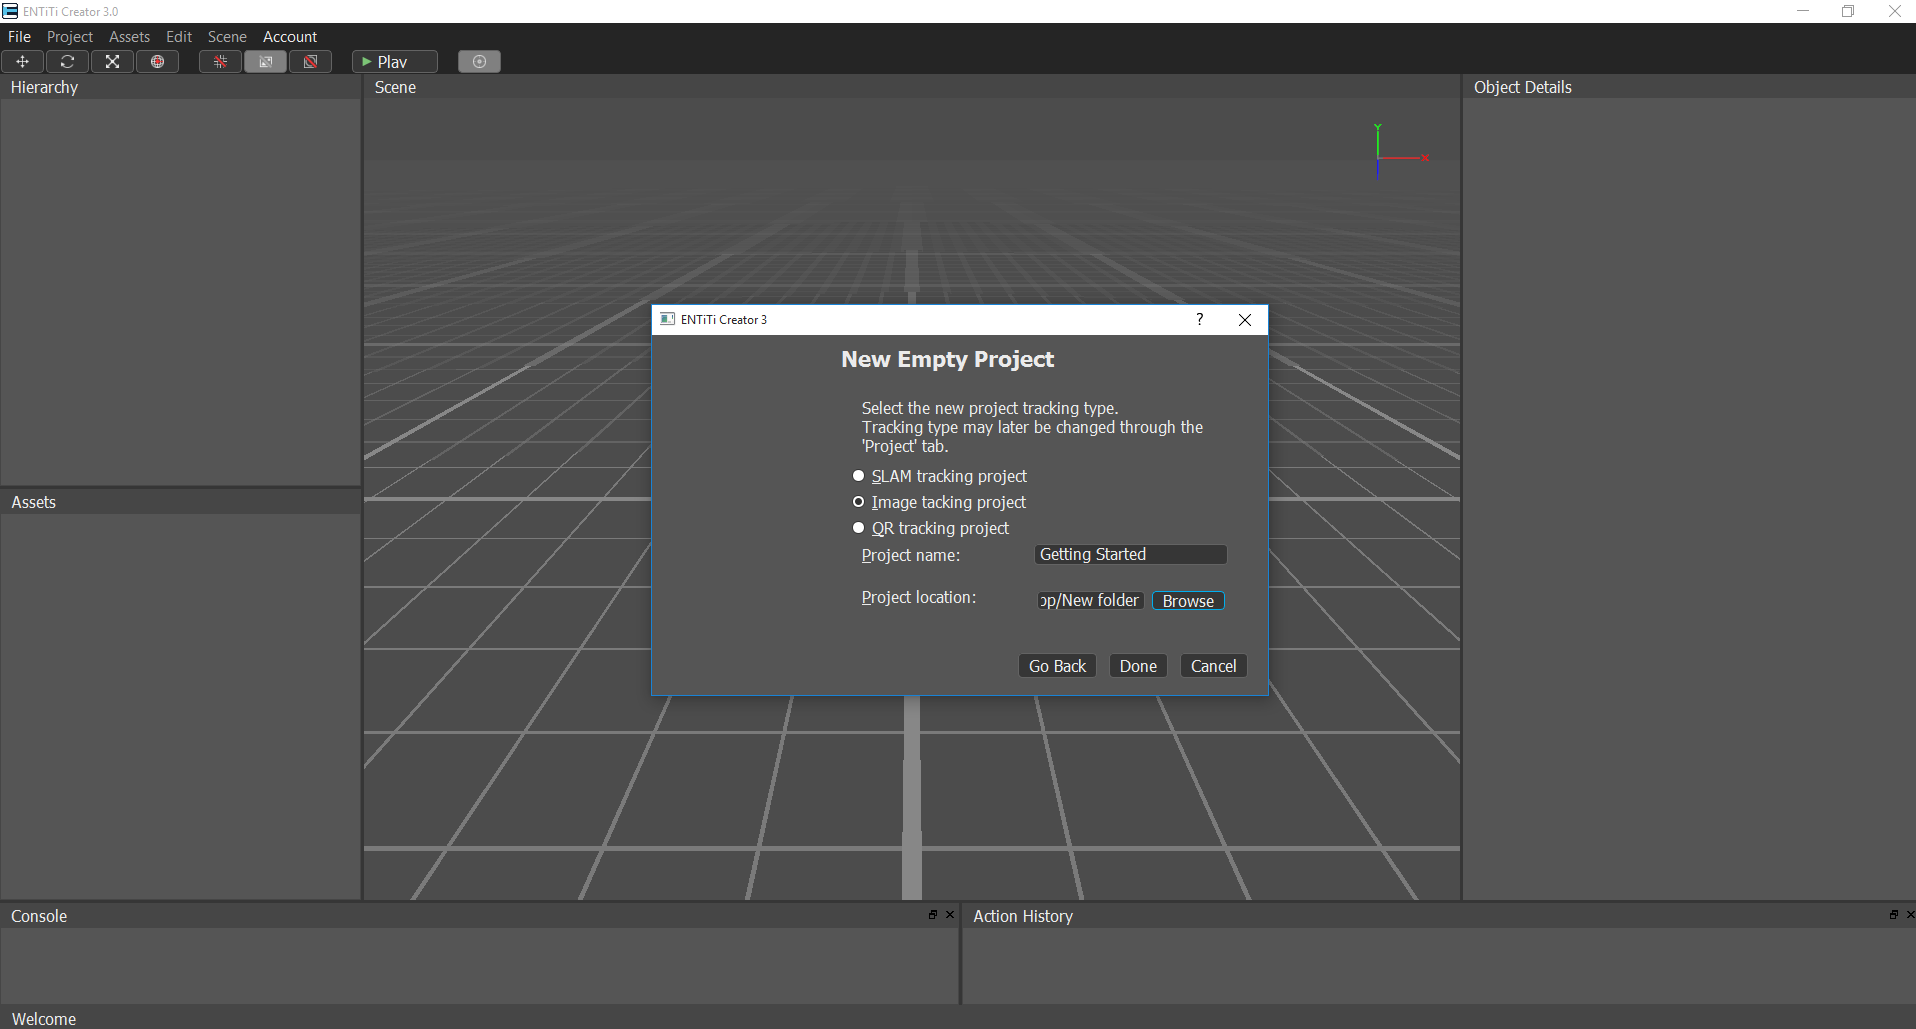
The directory where you save your project cannot already contain a .waproj file.
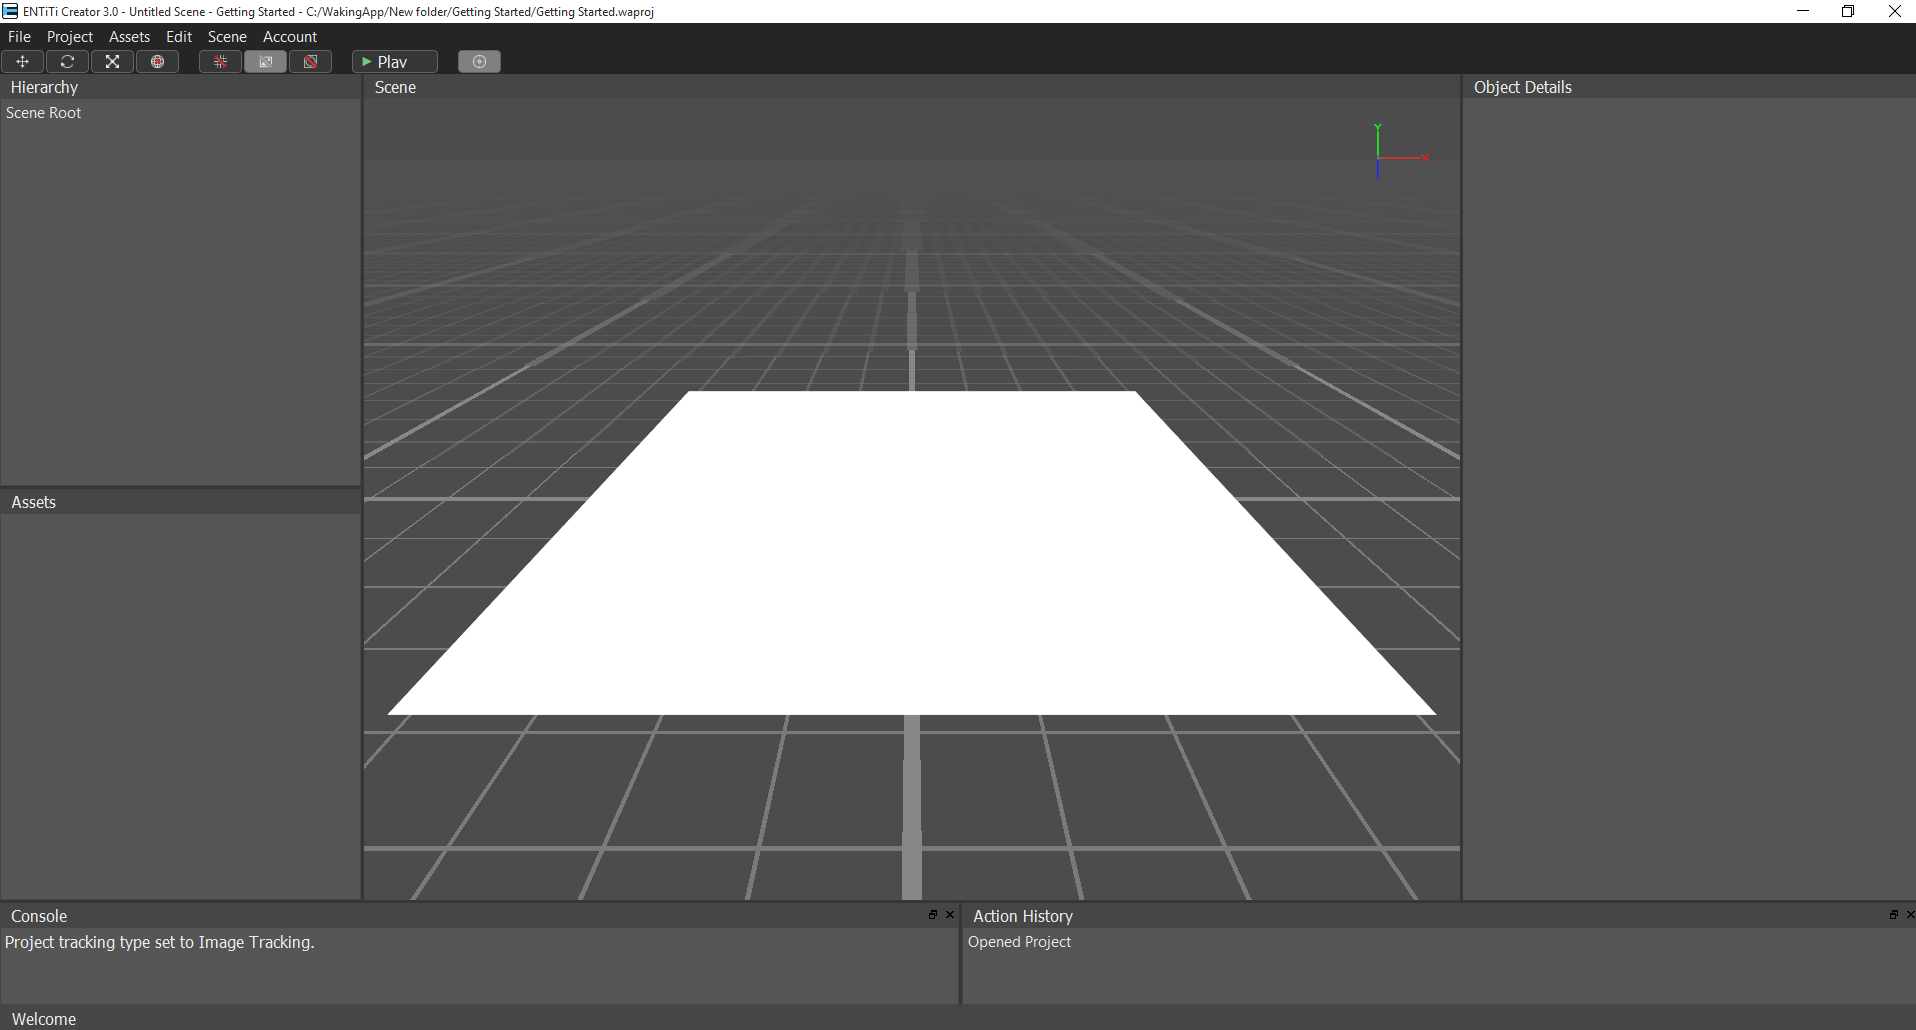
Now the project has been created and loaded successfully, and the Editor is ready for work.
Import assets
Before we can add custom models and use other custom files such as images or sound effects, they must be imported into the Project. First, download the assets to be used here (.zip) or here (folder)
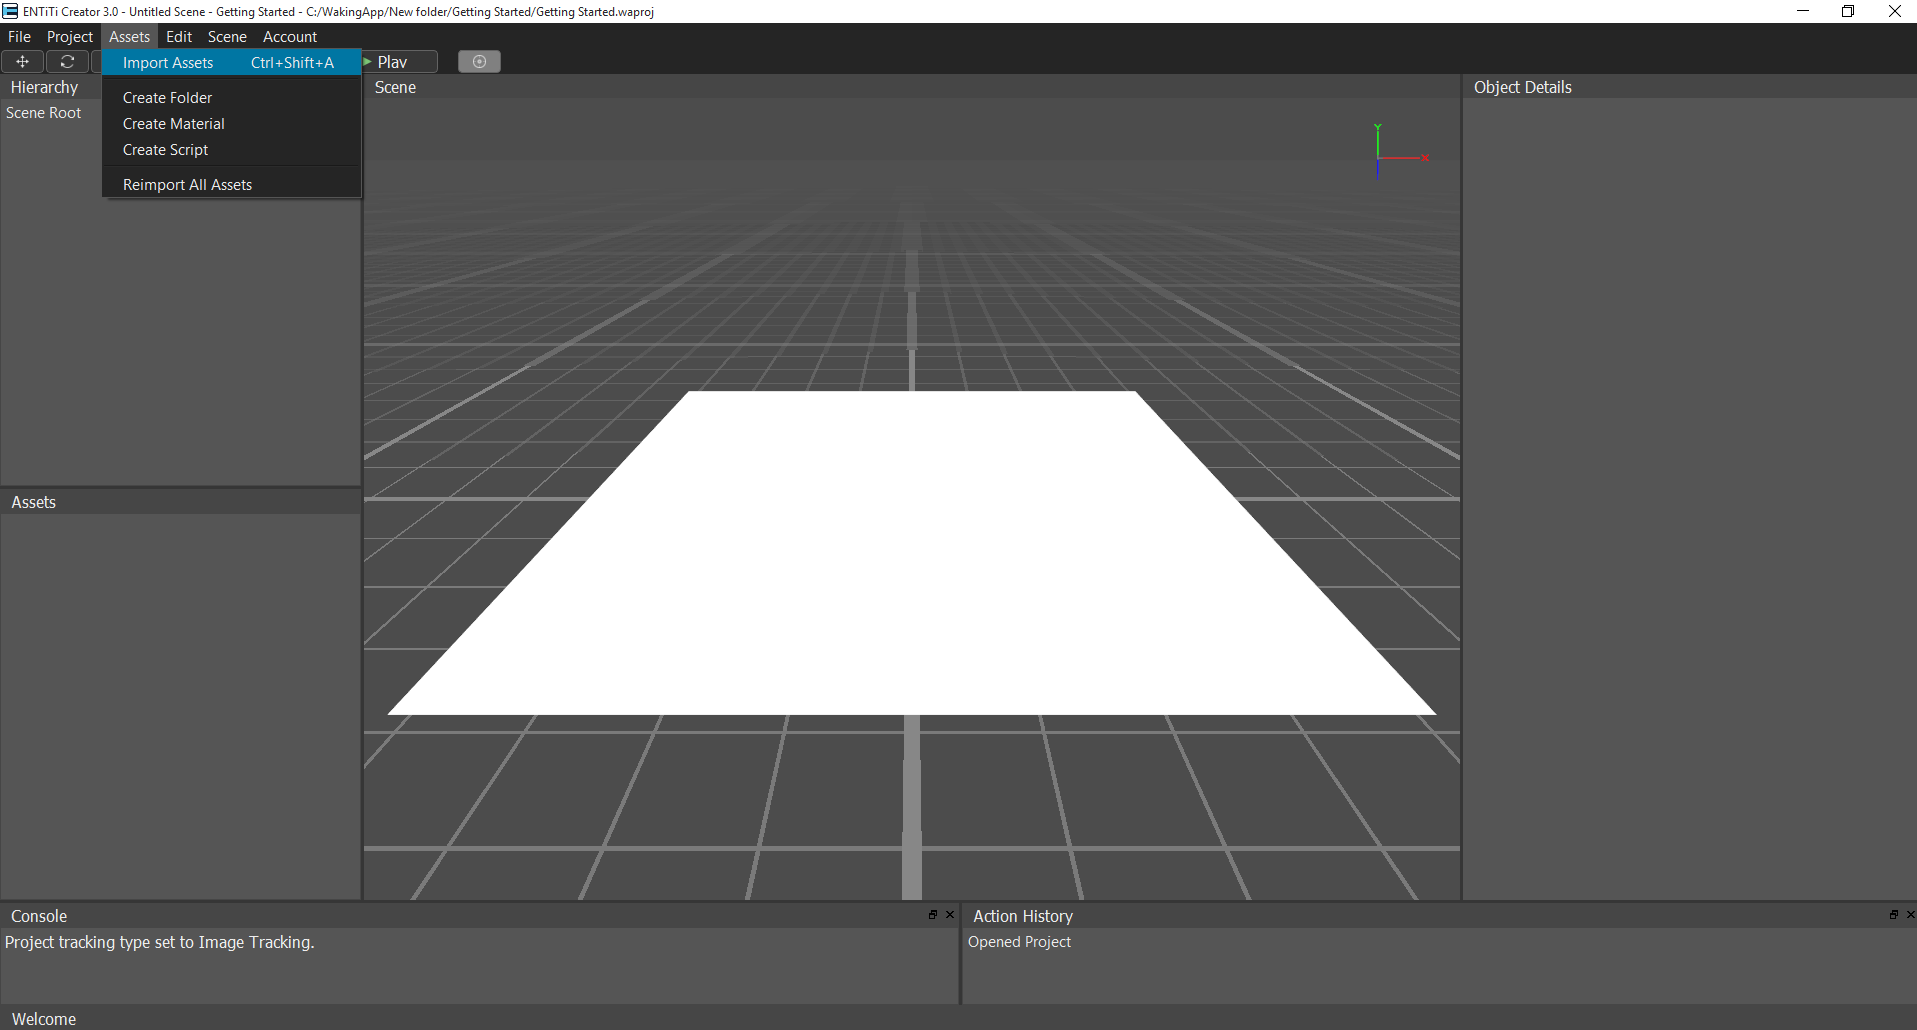
Select the assets to import (multiple files and formats may be selected at once), and click Open to copy these files into the loaded Project’s raw assets directory.

Once copied, these assets will be automatically imported into the loaded Project’s Compiled assets directory. After the import operation is complete, the assets may be used in the Project.
Set a target image
Choose an image to be used by this project for tracking by the mobile SDK / App. Click on Scene -> Set Target Image.


Drag a model asset to the scene
Select a Model asset from the Assets View and drag it to the Scene View to add it into the currently loaded Scene.

Once the load operation is complete and the Model is added to the Scene, it may be selected and manipulated to create the desired AR Experience.
Save scene
In order to view the created Scene in the application, it has to be saved to the disk as a Scene File:
Select the Save Scene action under the File Menu in the Main Menu Bar by clicking the menu item, or pressing the keyboard shortcut.

Choose a name and location to save the Scene File in. If the Scene was already saved before, the changes will be applied without having to specify the Scene File again.
Export project
In order to view the Project in the application, it has to be exported. In this case, to view the Project via the public WakingApp’s WakingApp AR Studio application, activate the Export Project… -> To Cloud action under the File Menu in the Main Menu Bar by clicking the menu item, or pressing the keyboard shortcut.


Select the scenes to include within the project, as well as the default scene from the drop-down list.
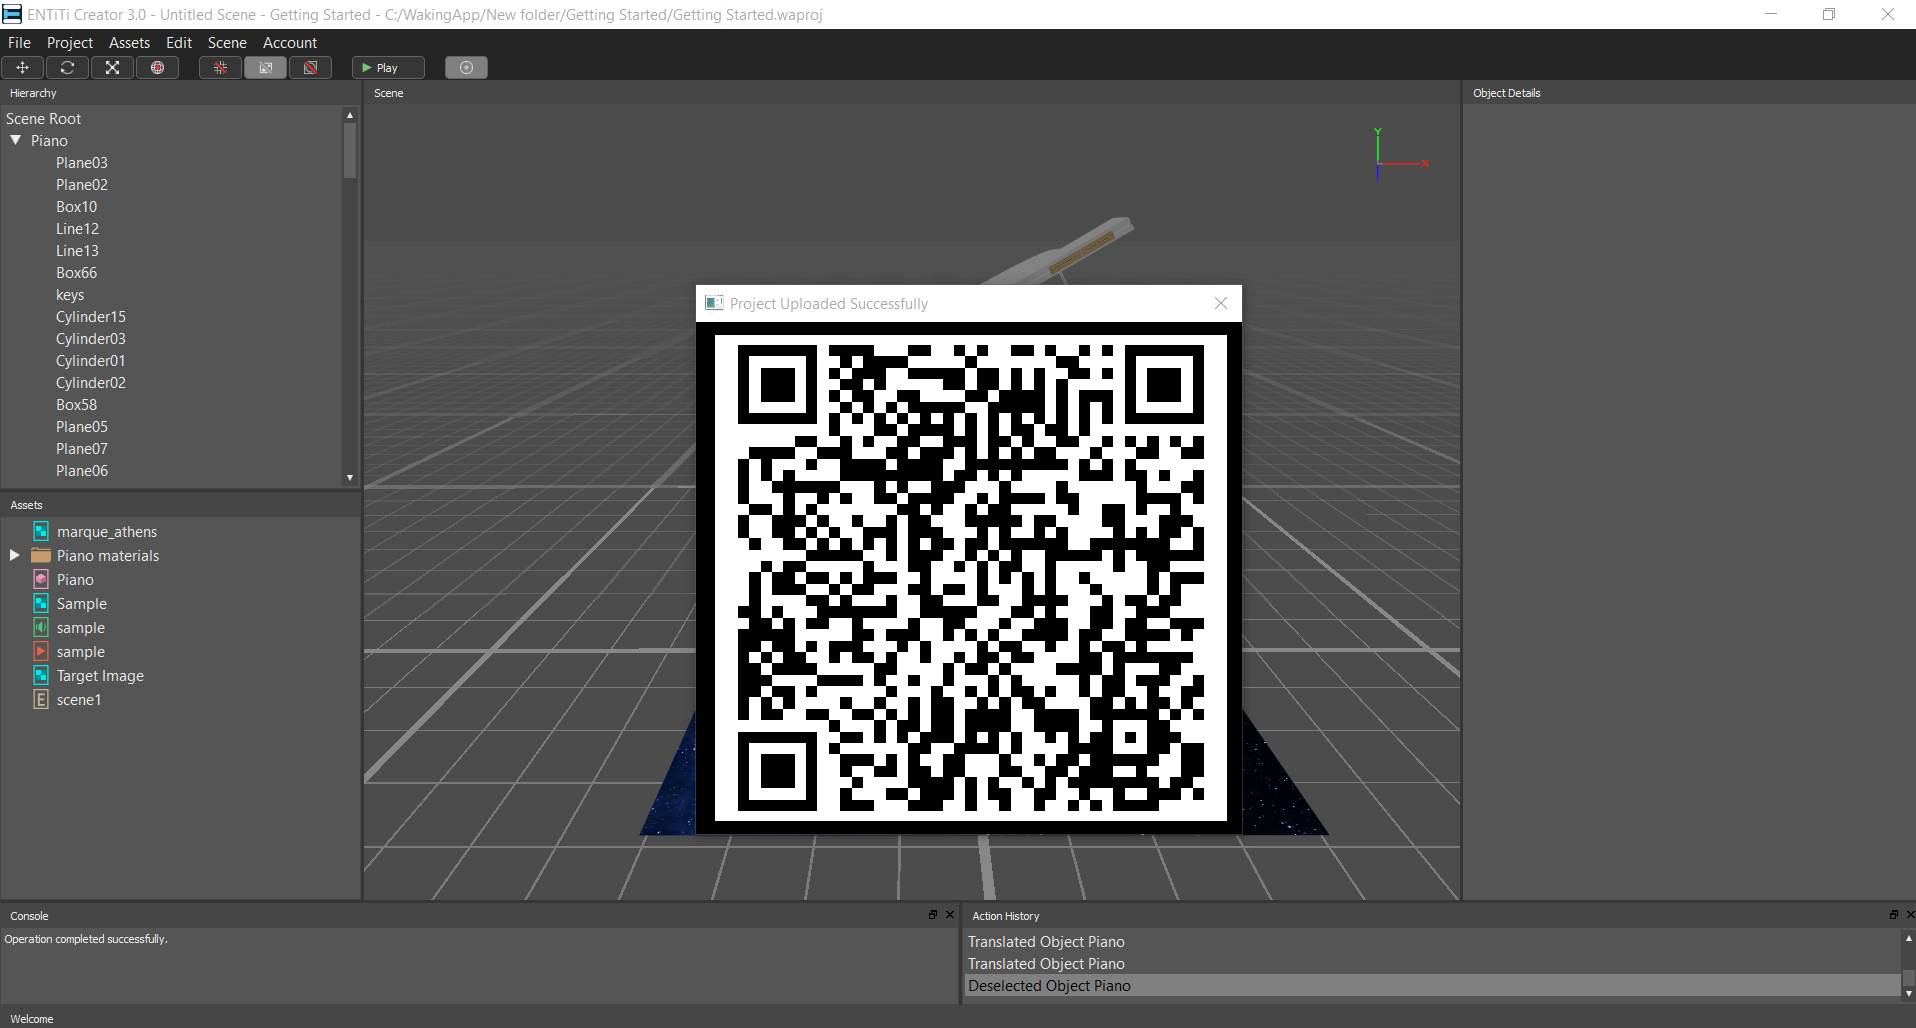
Publish project
If you choose the option ‘Publish project’, the project will be available in the WakingApp AR Studio application’s search feature, otherwise, only a direct link (QR) will be generated.
The Project will be packaged and uploaded to WakingApp’s Public Publish-Server.
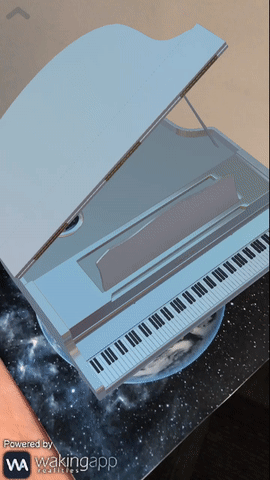
View in WakingApp Mobile App
Once the Upload operation succeeds, a QR code will be displayed on the screen. Scan this code with the WakingApp AR Studio mobile application to load and view the AR experience you’ve created.
WakingApp Mobile App
iOS – https://itunes.apple.com/us/app/entiti-3/id1363979183?mt=8
Android – https://play.google.com/store/apps/details?id=com.wakingapp.entiti3
Conventional Toolkits
Testing ARToolkit | ARToolkitplus
ARToolkit Marker – download here
